

Food photography is everywhere on social media. A simple plate of food can become eye-catching when the photo has good light, a clean background, and the right angle. You do not need an expensive camera or a large studio to take better food photos. A phone, a window, and a little practice can be enough.
Oncepik makes photography easier to understand by focusing on practical ideas that beginners can use. Food photography is a great place to start because you can practice at home, in a café, or at a restaurant. You can try different angles, colors, plates, and light until you find a look you like.
Whether you post food on Instagram, Facebook, Pinterest, TikTok, or a food blog, the goal is simple: make people stop scrolling and notice the food.
Why Good Food Photos Matter on Social Media
People often decide what to look at within seconds. A bright and inviting food photo can catch attention much faster than a dark or messy image.
Good food photography can help:
- Make meals look fresh and tasty
- Get more attention on social media
- Make a food page look professional
- Show the details of a dish
- Build a strong visual style
- Encourage people to try a recipe or restaurant
A good photo does not need to look perfect. It needs to make the viewer feel something. A warm bowl of soup should feel comforting. A colorful salad should feel fresh. A dessert should look tempting.
That feeling is what makes food photography powerful.
Start With Good Natural Light
Light is one of the most important parts of food photography. You can have beautiful food, but poor light can make the photo look flat or dull.
Natural light is often the easiest choice for beginners.
Place your food near a window during the day. Avoid strong sunlight falling directly on the plate. Soft window light usually gives food a more natural look.
Try Side Lighting
Place the window to the side of your food. This can create gentle shadows and help show texture.
Side light works well for:
- Bread
- Cakes
- Burgers
- Pasta
- Meat dishes
- Drinks
Avoid Very Harsh Light
Strong sunlight can create very dark shadows and bright spots. If the sunlight is too strong, use a thin curtain to soften it.
The goal is not to make everything perfectly bright. Some shadow can make the photo feel natural and give the food more shape.
Choose the Right Background
A busy background can take attention away from the food.
Keep the area around your plate simple. A wooden table, plain cloth, marble surface, or clean kitchen counter can work well.
oncepik encourages a simple approach to photography because beginners can create strong images without expensive equipment.
Keep the Main Focus Clear
Look at your photo before pressing the shutter.
Ask yourself:
- Is the food easy to see?
- Is anything distracting behind it?
- Are there too many objects?
- Does the background match the dish?
If the answer is no, remove a few things.
Sometimes the best improvement is simply taking something away.
Pick a Good Food Angle
The angle you choose can change the entire feeling of a food photo.
There is no single angle that works for every dish. Try a few options before choosing your final image.
Top-Down Food Photography
A top-down photo is taken from above the food. It works well for dishes with interesting shapes and colors.
This style is useful for:
- Pizza
- Breakfast spreads
- Salads
- Charcuterie boards
- Desserts
- Recipe photos
It also makes it easy to arrange several items in one frame.
45-Degree Angle
This angle gives the viewer a feeling of sitting at the table. It works well for many everyday meals.
Try it with pasta, burgers, soup, coffee, or a plate of rice.
Close-Up Photos
Move closer when the food has an interesting texture.
A close-up can show:
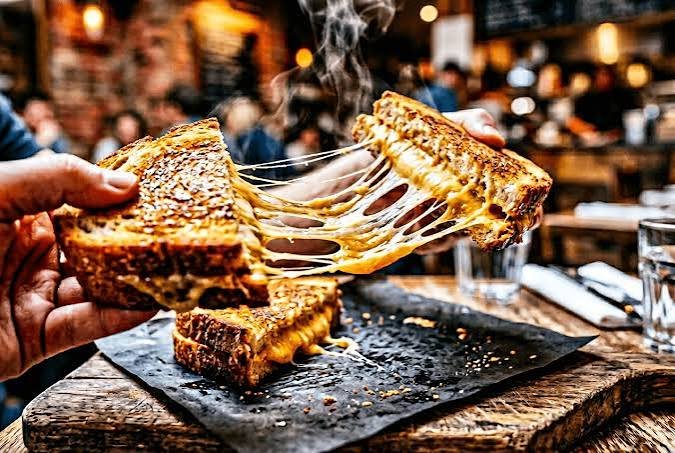
- Melted cheese
- Creamy sauce
- Crispy crust
- Fresh fruit
- Chocolate
- Herbs
The small details can make the food look much more inviting.
Use Colors to Make Food Stand Out
Color plays a big role in food photography.
Think about the colors already present in the dish. Then choose plates, napkins, or backgrounds that support those colors.
For example, a green salad may look great on a simple white plate. A colorful dessert may work better with a plain background.
Do Not Add Too Many Colors
Too many bright colors can make a photo feel messy.
Try using two or three main colors. This keeps the image clean and helps the food remain the star.
Fresh herbs, fruit slices, sauces, and simple table items can also add small touches of color.
Style the Food Naturally
Food styling does not mean making the meal look fake. It means arranging the food so it looks fresh and appealing.
Before taking the photo, check the plate.
Is the food placed neatly?
Are there crumbs in unwanted places?
Does the plate have sauce marks?
Does the food look fresh?
Small changes can make a big difference.
Add Simple Details
You can add a few natural items around the main dish.
For example:
- Fresh herbs
- Lemon slices
- Coffee beans
- A spoon
- A napkin
- Raw ingredients
- A small bowl of sauce
Do not add items just to fill empty space. Every object should have a reason to be there.
Keep Your Composition Clean
Composition simply means how things are arranged in your photo.
A strong food photo usually has one clear main subject.
If you are photographing a bowl of pasta, the pasta should be the first thing people notice.
You can place smaller objects around it to support the main subject.
Leave Some Empty Space
Empty space can make a photo feel cleaner. It also gives the viewer’s eyes somewhere to rest.
You do not need to fill every part of the frame.
A little empty space can make the main dish stand out more.
Capture Steam and Freshness
Some foods look better when they feel fresh and warm.
Steam from soup, freshly baked bread, or a hot cup of coffee can add life to a photo.
Take the picture soon after serving the food. Waiting too long can cause some foods to lose their shape, color, or fresh look.
For drinks, wipe the glass before taking the photo. Small details like this help create a cleaner image.
Take Several Photos
Do not stop after one picture.
Take several photos from different angles. Move your phone slightly. Change the distance. Try a different background.
You may find that a small change creates a much better result.
Taking several photos also helps you learn what works.
Review Your Photos
After shooting, look at all the images together.
Ask:
- Which photo looks most natural?
- Which one shows the food best?
- Is the lighting good?
- Is the background clean?
- Does the image make the food look appealing?
Choose the strongest image instead of simply using the first one.
Simple Editing Can Improve Your Photos
Editing should improve a photo, not completely change it.
Basic adjustments can help with brightness, contrast, and color.
If the photo is too dark, make it slightly brighter. If the colors look dull, add a small amount of color. If the image looks too strong, reduce the effect.
Avoid heavy filters that make food look unnatural.
oncepik supports the idea of keeping photography simple and natural. Good lighting and careful shooting should come first. Editing should only add the final touch.
Create a Consistent Social Media Style
If you post food photos regularly, try to create a similar look across your page.
You might use:
- Similar backgrounds
- Similar lighting
- The same type of framing
- Simple colors
- A clean editing style
This helps your page feel more organized.
It also makes your photos easier to recognize.
Match Photos With Your Audience
Think about who will see your content.
A recipe page may need clear top-down images. A restaurant page may benefit from warm table shots. A food blogger may use a mix of close-ups and lifestyle photos.
The best style depends on the type of content you share.
Food Photography Tips for Beginners
If you are just starting, keep your setup simple.
Use these basic tips:
- Shoot near a window.
- Keep the background clean.
- Try more than one angle.
- Keep the food as the main focus.
- Use simple props.
- Avoid strong filters.
- Take several photos.
- Check small details before shooting.
- Practice with different foods.
- Learn from every photo.
You do not need to master everything at once.
Start with light. Then work on angles. After that, practice styling and editing.
Small improvements will add up over time.
Turn Everyday Meals Into Great Content
You do not need a special recipe to practice food photography.
Try photographing your breakfast, afternoon coffee, dinner, or a simple homemade dessert.
Every meal gives you a chance to practice.
Take the same dish in different ways. Try a top-down photo first. Then take a side photo. Move closer for a detail shot.
Compare the results.
This simple exercise can teach you more than taking the same type of photo every day.
Final Thoughts
Great food photography is not about having the most expensive camera. It is about light, timing, color, composition, and attention to detail.
Start with natural light and a clean background. Choose an angle that suits the dish. Keep the styling simple and take several photos before choosing your favorite.
With regular practice, even a smartphone can help you create attractive food photos for social media. The more you shoot, the easier it becomes to understand what makes an image look good.
Food photography should also be fun. Try new ideas, make small changes, and do not worry about getting every photo perfect. Your own style will develop naturally as you practice.
FAQs
1. Can I take food photos with my phone?
Yes. A modern phone can take excellent food photos when you use good light and a clean setup.
2. What is the best light for food photography?
Soft natural light near a window is a simple choice for beginners.
3. Which angle is best for food photos?
It depends on the dish. Try top-down, 45-degree, and close-up angles.
4. Should I use filters on food photos?
Use filters lightly. Natural colors usually make food look more appealing.
5. How can I improve my food photography?
Practice often. Try different lights, angles, backgrounds, and simple styling ideas.