

Online forms have made everything from job applications and university admissions to government services and professional registrations much easier. Instead of printing documents and visiting an office, users can upload photographs, signatures, identity documents, and certificates directly through a website. However, there is one common problem: the image you want to upload may not meet the website’s size requirements.
An application portal might ask for a photograph below 100KB, while another may require an image between 20KB and 200KB. Some platforms also specify exact pixel dimensions, supported formats, or maximum file sizes. When your photo does not meet these requirements, the upload may fail even if the image itself is perfectly clear.
Fortunately, preparing a photo for an online application does not have to be complicated. A browser-based image resizer online free tool can help you adjust image dimensions and reduce file size without requiring professional editing software. Image Resizer Studio
The key is understanding what the online form actually requires before changing the image. File size, dimensions, format, aspect ratio, and image quality all affect whether a photograph will be accepted.
This guide explains how to prepare photos correctly, what different requirements mean, how to reduce image size, and how to avoid the most common upload problems.
Why Online Forms Have Image Size Requirements
Online platforms receive thousands or even millions of files. If every user could upload unlimited high-resolution photographs, the system would require significantly more storage and bandwidth.
For this reason, websites establish technical limits. These limits make uploads faster and help maintain consistent processing across their systems.
Common requirements include:
-
Maximum file size
-
Minimum file size
-
Specific width and height
-
Required aspect ratio
-
Supported file formats
-
Minimum image resolution
-
Maximum image resolution
For example, an application might require a passport-style photograph in JPG format with a file size below 200KB. Another platform may require a signature image under 50KB.
The requirements are not universal. Always check the instructions provided by the specific website before modifying your photo.
Understanding KB, MB, and Image Dimensions
One of the most confusing aspects of online image requirements is the difference between file size and image dimensions.
File Size
File size refers to how much digital storage the image occupies.
It is usually measured in:
-
KB — kilobytes
-
MB — megabytes
-
GB — gigabytes
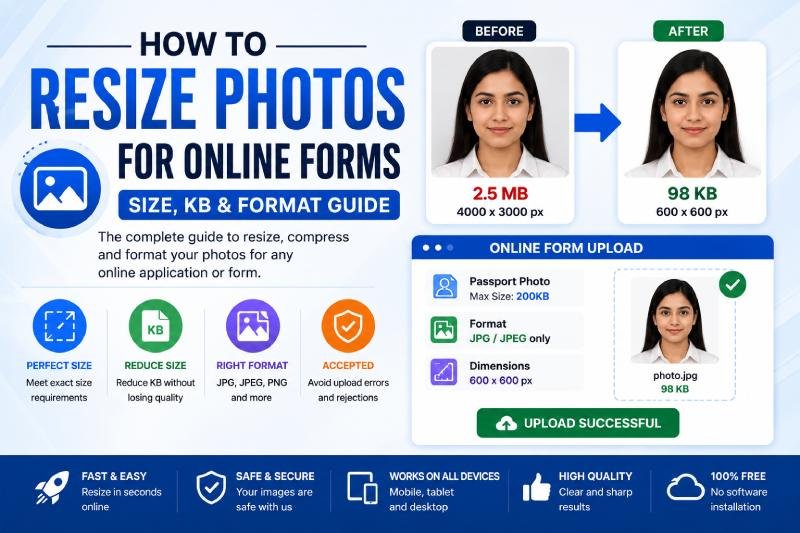
For example, a photograph might be 2.5MB before optimization and 180KB afterward.
Image Dimensions
Dimensions refer to the physical pixel size of the image.
Examples include:
-
600 × 600 pixels
-
800 × 600 pixels
-
1200 × 800 pixels
An image can have large dimensions but a relatively small file size, or small dimensions but a surprisingly large file size depending on its format and compression.
Understanding this difference is important because reducing dimensions and reducing file size are two related but different processes.
When Should You Resize a Photo?
You should consider resizing a photo whenever its dimensions or file size exceed the requirements of the online form.
For example, imagine you have a smartphone photograph measuring 4000 × 3000 pixels with a file size of 4MB. The application portal might accept only a 600 × 600 pixel image below 200KB.
Uploading the original file will probably result in an error.
Resizing the image reduces its dimensions, while compression can reduce its file size further. Together, these steps can make the photo suitable for the application.
The same principle applies to:
-
Job applications
-
College admissions
-
Scholarship forms
-
Government applications
-
Examination registrations
-
Visa applications
-
Recruitment portals
-
Professional certifications
-
Membership registrations
-
Online identity verification
How to Resize Photo for Online Form Requirements
The first step is to identify the exact requirements of the form.
Look for information such as:
File format: JPG, JPEG, PNG, etc.
Maximum file size: For example, 100KB or 200KB.
Required dimensions: For example, 600 × 600 pixels.
Aspect ratio: Whether the image needs to be square, portrait, or landscape.
Background requirements: Some applications specify a plain background.
Once you know these specifications, you can prepare the image accordingly.
Start by creating a copy of the original photograph. This is important because you may need the original file later.
Next, adjust the dimensions if necessary. After resizing, check the resulting file size. If it is still too large, apply additional compression.
Finally, open the processed image and make sure the face, text, signature, or other important details remain clear.
Why Resizing Alone May Not Be Enough
Many people assume that reducing the pixel dimensions automatically makes an image small enough for an online form.
Sometimes it does, but not always.
Image format and compression level have a major effect on file size.
For example, reducing a photograph from 4000 × 3000 pixels to 1200 × 900 pixels may significantly reduce its size, but it could still be larger than the form’s maximum limit.
In that situation, compression is necessary.
The best approach is usually:
Resize → Compress → Check → Download
This process gives you more control over both dimensions and file size.
How to Reduce Image Size Without Making It Blurry
Image quality is especially important when submitting official photographs and documents.
Over-compression can make a face look blurry, remove important details from a scanned document, or make a signature difficult to read.
To avoid this problem, do not immediately apply the strongest compression available.
Instead, use moderate compression and check the result.
A good workflow is:
-
Resize the image to the required dimensions.
-
Compress the image moderately.
-
Check the final file size.
-
Open the image at normal viewing size.
-
Make sure important details remain visible.
-
Increase compression only if necessary.
The objective is not to create the smallest possible file. The objective is to create the smallest acceptable file while retaining sufficient quality.
Choosing the Right Image Format
Image format can have a major impact on file size.
JPEG
JPEG is one of the most common formats for photographs.
It works particularly well for:
-
Passport-style photographs
-
Personal photographs
-
Scanned photographs
-
Online application photos
JPEG usually provides a good balance between image quality and file size.
PNG
PNG is excellent for graphics, logos, screenshots, and images that require transparency.
However, PNG files can sometimes be considerably larger than JPEG files when used for photographs.
If an application specifically requests JPG or JPEG, converting a PNG photograph to JPEG may help reduce its file size.
WebP
WebP provides efficient compression and is widely used on modern websites.
However, not every online application supports WebP uploads.
Therefore, always follow the format specified by the application portal instead of automatically choosing the smallest available format.
How to Compress JPEG to 200KB
A common online requirement is to compress JPEG to 200KB.
Suppose your original photograph is 2MB. Simply changing the file extension will not make it 200KB. The image needs to be properly resized and compressed.
A practical workflow is:
-
Start with the original JPEG.
-
Check its dimensions.
-
Resize it according to the form requirements.
-
Apply compression.
-
Check the final file size.
-
If it remains above 200KB, compress it further.
-
Review the image quality.
-
Download the final version.
If the form requires a maximum of 200KB, it is generally safer to keep the final file slightly below the limit rather than attempting to hit the exact number.
For example, if the maximum is 200KB, a final image around 180–195KB gives you a reasonable margin.
How to Resize Image to Specific KB
Sometimes an online form gives a strict requirement such as:
Photo: 20KB–50KB
or:
Photograph: below 100KB
or:
Image: maximum 200KB
In these situations, you need to resize image to specific KB rather than simply changing its dimensions.
There is no universal width or height that guarantees a particular file size. The final KB value depends on:
-
Image dimensions
-
Image format
-
Image content
-
Compression level
-
Color information
-
Original file structure
A detailed photograph with lots of textures may remain larger than a simple image at the same dimensions.
This is why it is better to resize first and then adjust compression until the required file size is reached.
Why Smartphone Photos Often Need Optimization
Modern smartphones produce extremely high-resolution photographs.
This is useful when printing photographs or editing them professionally, but it is often unnecessary for online forms.
A smartphone photograph might be:
-
4000 × 3000 pixels
-
5MB in size
-
High-resolution JPEG
An online application might need:
-
600 × 600 pixels
-
Under 200KB
-
JPEG format
Uploading the original photograph wastes storage and may exceed the platform’s limits.
Optimizing the photo before uploading makes the process much easier.
Maintaining the Correct Aspect Ratio
Aspect ratio describes the relationship between an image’s width and height.
For example, a square image has a 1:1 aspect ratio.
If you resize an image without maintaining its original proportions, the subject may become stretched or compressed.
A person’s face can appear unusually wide or narrow if the image is distorted.
Whenever possible, maintain the original aspect ratio unless the application specifically requires a particular shape.
If a square image is required, crop the photograph appropriately before resizing it.
Cropping vs Resizing
Cropping and resizing are not the same.
Cropping removes parts of the image.
Resizing changes the dimensions of the entire image.
For example, if a photograph is 4000 × 3000 pixels and you need a square image, resizing it directly to 600 × 600 pixels will distort the photograph.
Instead, you can first crop it to a square composition and then resize it to 600 × 600 pixels.
This produces a much more natural result.
What to Do If the Photo Is Still Too Large
If your image remains above the required file size after resizing, there are several options.
Reduce the Dimensions Further
If the form allows smaller dimensions, reducing the width and height can lower the file size.
Increase Compression
Moderately increasing compression can further reduce the file size.
Change the Format
If the application accepts JPEG and your image is PNG, converting it may significantly reduce the file size.
Remove Unnecessary Metadata
Some image files contain additional metadata that contributes to file size. Optimization tools may remove unnecessary information during processing.
However, never change the file format or quality level if the application specifically requires something else.
How to Check Your Final Image Before Uploading
Before submitting an image, verify all requirements.
Check:
-
File name
-
File format
-
File size
-
Width
-
Height
-
Image quality
-
Aspect ratio
-
Orientation
It is also useful to open the final image on your device before uploading.
Make sure that:
-
The photograph is clear.
-
The face is recognizable.
-
Text remains readable.
-
The signature is visible.
-
There are no unexpected borders.
-
The image has not become distorted.
A few seconds of checking can prevent an upload error later.
Common Online Form Image Problems
File Is Too Large
This usually means the image exceeds the maximum KB or MB limit.
Solution: Resize and compress the image.
File Is Too Small
Some platforms specify a minimum file size.
Solution: Use less aggressive compression while keeping the required dimensions.
Unsupported Format
The website may accept only JPG or JPEG.
Solution: Convert the image into the required format.
Wrong Dimensions
The image may have too many or too few pixels.
Solution: Resize it according to the specified width and height.
Image Looks Distorted
This usually happens when the aspect ratio has been changed incorrectly.
Solution: Maintain the original proportions or crop before resizing.
Image Looks Blurry
The file may have been compressed too aggressively.
Solution: Use a higher-quality output and resize more appropriately.
Online Forms That Commonly Require Resized Photos
Image requirements are particularly common in application-based websites.
Job Applications
Recruitment websites may request profile photographs, resumes, certificates, or identity documents.
University Applications
Students may need to upload photographs and signatures during admissions.
Examination Forms
Exam registration portals frequently specify strict photo and signature requirements.
Government Applications
Many government services require standardized photographs and document uploads.
Visa and Travel Applications
Certain visa-related forms may request photographs in specific dimensions and file formats.
Scholarship Applications
Students may need to upload photographs and supporting documents under strict file size limits.
Because requirements vary from platform to platform, always read the instructions on the specific form.
Why You Should Keep the Original Photo
Never overwrite the original image when optimizing a photograph for an online form.
Instead, create a separate optimized copy.
This gives you flexibility if:
-
Another website requires a different size.
-
You need a higher-resolution version later.
-
The application rejects the optimized file.
-
You need to edit or crop the image differently.
Keeping the original also prevents unnecessary quality loss from repeated editing.
Tips for Better Online Form Uploads
A few simple habits can make image uploads much easier.
Read the requirements first.
Do not resize randomly before knowing the target size.
Keep the original file.
Always create a separate optimized copy.
Use the correct format.
Follow the exact format requested by the website.
Do not over-compress.
A smaller file is not automatically a better file.
Check the final KB size.
Make sure the image falls within the specified range.
Maintain aspect ratio.
Avoid stretching or squeezing the image.
Preview before submitting.
Make sure all important details remain visible.
Leave some room below the maximum limit.
If the maximum is 200KB, an image around 180–190KB may be safer than one sitting exactly at the limit.
The Role of Image Optimization in Everyday Digital Tasks
Resizing images is not limited to online forms.
The same skills are useful for:
-
Website uploads
-
Blog publishing
-
Social media posts
-
Email attachments
-
E-commerce product photos
-
Profile pictures
-
Digital portfolios
-
Presentations
-
Online marketplaces
Once you understand the difference between dimensions and file size, optimizing images becomes much easier.
Final Thoughts
Knowing how to resize photo for online form requirements can save time and prevent unnecessary upload problems. Whether a website asks for a photograph under 50KB, 100KB, or 200KB, the basic process remains the same: understand the requirements, resize the dimensions when necessary, compress the file, and check the final output.
The best results come from balancing file size and image quality rather than simply making an image as small as possible. Choosing the correct format, maintaining the aspect ratio, and checking the final KB size are equally important.
For anyone regularly submitting online applications, learning how to reduce image size online, resize image online, and resize image without losing quality can make digital forms much easier to manage.
With the right workflow, even a large smartphone photograph can be transformed into a clean, appropriately sized image that meets an application’s technical requirements while remaining clear and professional.