


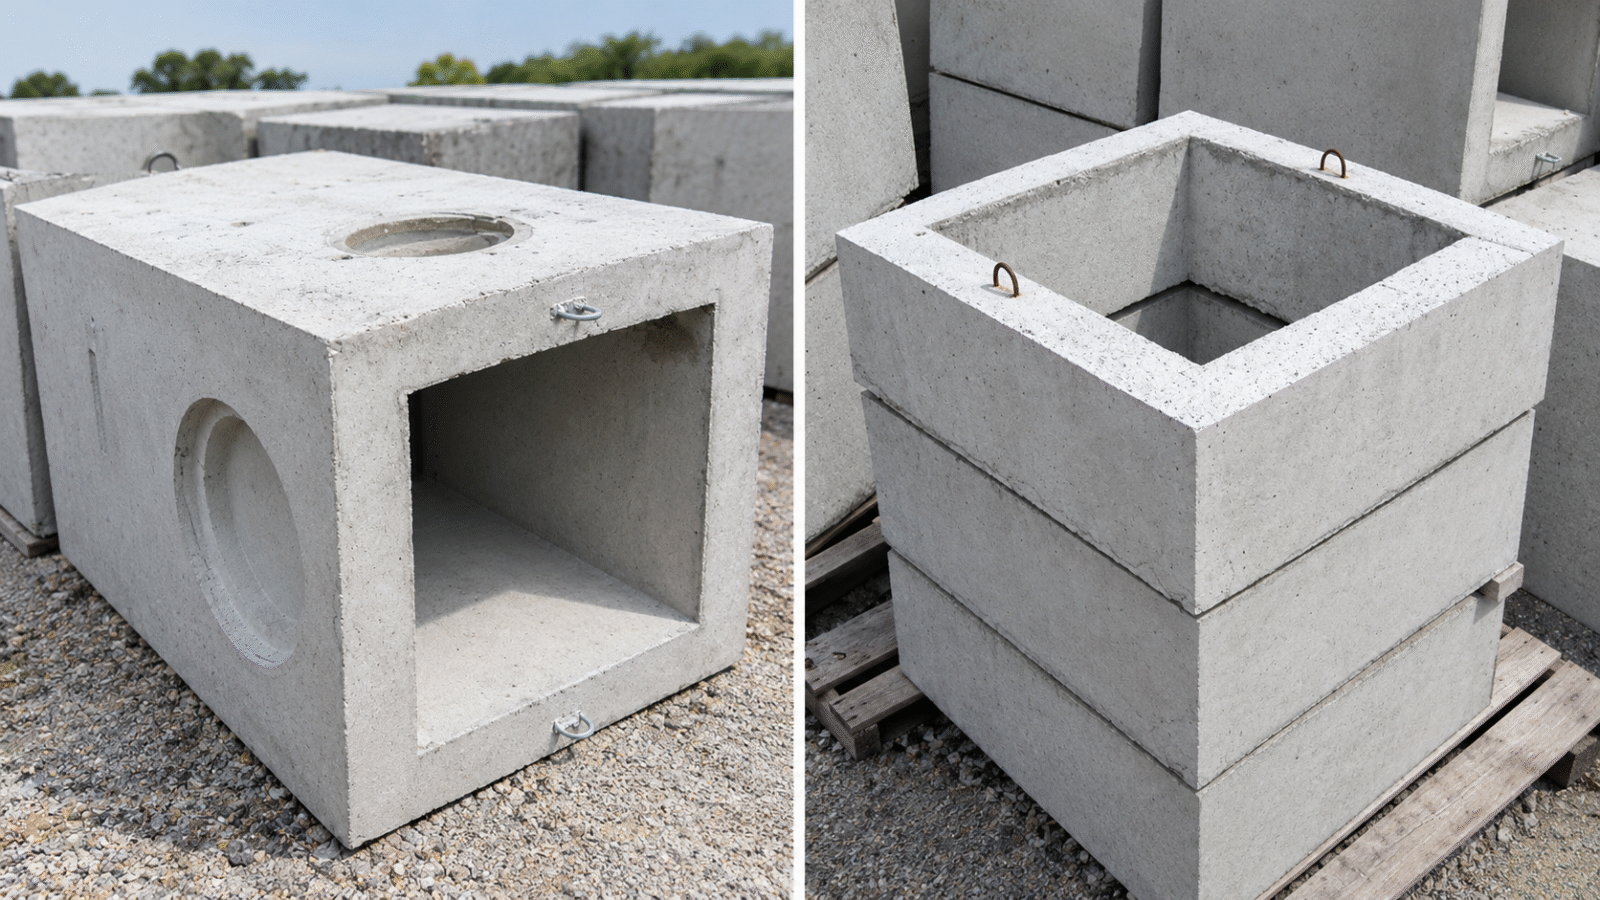
Installing a concrete catch basin correctly helps control stormwater, reduce surface flooding, and protect paved areas from water damage. Whether you are working on a residential driveway, a commercial parking lot, or a larger drainage project, proper catch basin installation depends on careful site preparation, a stable base, accurate levelling, secure pipe connections, and suitable backfilling.
Concrete catch basins collect surface runoff and direct it into a drainage system. However, even a high-quality basin can underperform if it is installed at the wrong elevation, connected incorrectly, or surrounded by poorly compacted soil.
This guide explains the main steps involved in installing a concrete catch basin, the factors to check before work begins, and when professional installation is necessary.
What Should You Check Before Catch Basin Installation?
Before excavating, confirm the drainage design, the location of underground utilities, the required basin dimensions, and the finished ground elevation.
Start by reviewing the project plans. These should identify where the basin will sit, the direction of water flow, the inlet and outlet pipe sizes, and the required connection elevations. For larger projects, the plans may also specify the basin type, frame and grate, traffic loading requirements, and applicable municipal standards.
The site assessment should account for:
-
Drainage requirements: Determine where runoff collects and where it needs to go.
-
Basin dimensions: Check the external dimensions, internal opening, total height, and pipe openings.
-
Soil conditions: Identify soft ground, groundwater, unstable fill, or other conditions that may affect excavation and support.
-
Traffic loads: Confirm whether the installation will be exposed to pedestrians, passenger vehicles, delivery trucks, or heavy equipment.
-
Utility locations: Identify buried electrical, gas, water, telecommunications, and existing drainage services.
-
Access for equipment: Plan how the basin will be delivered, lifted, and lowered into the excavation.
A precast concrete catch basin can be heavy. Acton Precast’s standard catch basin is listed at approximately 2,500 pounds, while its Shorty model weighs approximately 1,800 pounds. Plan for suitable lifting equipment and safe access before delivery.
Step 1: Prepare the Site and Excavate the Area
The first stage of catch basin installation is preparing the site and excavating the space needed for the basin, bedding material, pipe connections, and working clearance.
Mark the basin location
Mark the proposed basin position using the approved drainage plan. Check that it is located where surface water can reach the inlet without creating unwanted ponding or directing runoff toward buildings.
The basin’s position must also allow the connected pipes to maintain the required slope and elevation. Moving a basin after excavation can add labour and delay the project, so confirm its location before digging.
Locate underground utilities
Have underground utilities identified and marked through the appropriate local utility-locating process before excavation. Never assume that an area is clear simply because no services are visible at the surface.
If unexpected utilities, groundwater, or unstable soil are encountered, stop and reassess the excavation before continuing.
Excavate to the required dimensions
Excavate deep and wide enough to accommodate the basin, the specified bedding layer, pipe connections, and safe working clearance. The required excavation depth depends on the basin height, finished surface elevation, pipe inverts, and base design.
Avoid excavating substantially below the planned formation level. Over-excavation can create a weak area that needs to be corrected with approved material before the basin is placed.
The excavation must also be stable enough to protect workers and equipment. Deep excavations, loose soil, and groundwater may require additional protective measures designed for the site conditions.
Step 2: Prepare the Base and Bedding
A stable, level base supports the catch basin and helps prevent uneven settlement. Poor base preparation can lead to movement, pipe misalignment, damaged joints, or changes in the finished grate elevation.
Inspect the excavation bottom
Remove loose soil, debris, standing water, and unsuitable material from the base. The supporting ground should be firm and consistent with the project specifications.
If the soil is soft, disturbed, or unable to support the structure, the installation team should determine the appropriate corrective measures. Depending on the site and engineering requirements, this may involve removing unsuitable material and replacing it with approved granular material or using another specified foundation treatment.
Install the specified bedding
Place the bedding or foundation material required by the project design. This may be compacted granular material or another approved base, depending on the soil conditions, basin type, and applicable standards.
Spread and level the material evenly. Compact it as specified, while maintaining the required elevation and avoiding conditions that could cause the basin to sit unevenly.
Do not choose the bedding thickness or material based on a general rule alone. Follow the engineered details and local requirements for the particular installation.
Check the base elevation
Use appropriate surveying or levelling equipment to confirm that the base is at the planned elevation. Check the surface in more than one direction so that the basin will be properly supported.
A level base is especially important for precast concrete units because their weight makes adjustments difficult after placement.
Step 3: Place and Level the Concrete Catch Basin
Once the excavation and base are ready, the basin can be lowered into position using suitable lifting equipment and approved lifting methods.
Inspect the basin before installation
Before lifting, check the precast unit for visible cracks, damaged edges, or other issues that could affect its performance. Confirm that the delivered model matches the approved dimensions and that the required pipe openings or knockouts are available in the correct locations.
Verify the basin’s weight and lifting requirements before handling it. Keep workers clear of suspended loads and follow the equipment manufacturer’s instructions and site safety procedures.
Lower the basin into position
Lower the basin carefully into the excavation. Avoid striking the excavation walls, base, or nearby pipes.
Position the unit so that its inlet and outlet openings align with the drainage layout. Allow sufficient room for the pipe connections and any specified jointing materials.
Do not force a pipe to meet an opening that is incorrectly positioned. Correct the alignment before completing the connection.
Confirm the elevation and level
Check the basin’s orientation and elevation against the drainage drawings. The top of the frame and grate must finish at the required surface level.
For paved areas, the grate should work with the surrounding surface grades so that runoff enters the basin instead of flowing past it. In landscaped areas, the finished grade should also direct water appropriately.
If the basin needs additional height, use compatible risers or other components approved for the application. Seal joints as specified by the manufacturer and project documents.
Acton Precast offers catch basin risers in several listed heights, including 2, 3, 6, 12, and 24 inches. The correct combination depends on the required finished elevation and approved assembly.
Step 4: Connect the Drainage Pipes
Correct pipe connections allow stormwater to enter and leave the catch basin as designed. The number, size, and position of the openings depend on the drainage plan and the basin model.
Align the inlet and outlet pipes
Check the required pipe invert elevations before making connections. The invert is the internal bottom level of the pipe, and it helps determine how water flows through the system.
The inlet and outlet should match the design elevations and required flow direction. Where multiple pipes connect, verify each opening against the approved drawing.
Acton Precast’s standard catch basin is listed with 15- to 18-inch-diameter knockouts on two opposing sides and a 10- to 12-inch knockout on a third side. The product drawing should be reviewed before finalizing the pipe layout.
Make secure, compatible connections
Use the connection method, seals, and fittings specified for the basin and pipe material. The joint must provide the required fit and performance for the intended drainage system.
Avoid enlarging openings or modifying the precast structure without approval. Unapproved cutting can damage reinforcement or compromise the unit.
Check that each pipe is properly supported and aligned. Pipes should not place unintended loads on the basin wall or rely on the connection itself for support.
Confirm the flow path
Before backfilling, verify that the pipes follow the intended route and that there are no obvious obstructions or alignment problems. Confirm that the system can drain toward its intended outlet.
Any required inspections or testing should be completed at the stage specified in the project documents, while the connections remain accessible.
Step 5: Backfill and Compact Around the Basin
Backfilling supports the basin and restores the surrounding ground. However, the wrong material or uneven compaction can cause settlement, movement, or damage to connected pipes.
Use approved backfill material
Select backfill according to the project specifications and site conditions. Remove large debris and unsuitable material that could damage the basin or pipes.
Place the material in controlled layers around the structure. Follow the specified placement and compaction requirements rather than filling the entire excavation at once.
Backfill evenly
Place material around the basin in a balanced manner. Uneven placement or excessive compaction force in one area can create unwanted lateral pressure.
Take particular care around pipe connections. Support the pipes as specified and avoid shifting them while filling the surrounding space.
Use suitable compaction equipment for the available clearance. Heavy equipment should not operate too close to the structure unless permitted by the design and installation requirements.
Restore the finished surface
After backfilling and compaction, restore the surrounding surface to the planned elevation and slope. For driveways and parking lots, this includes coordinating the basin frame and grate with the pavement.
The finished surface should direct runoff toward the inlet where intended. Avoid depressions that collect water around the frame or raised areas that prevent runoff from entering the basin.
Step 6: Inspect the Installation Before Handover
A final inspection helps confirm that the catch basin has been installed in line with the approved design.
Check the following items:
-
Position and elevation: The basin is in the correct location and at the required level.
-
Frame and grate: The components are compatible with the basin and appropriate for the intended loading.
-
Pipe connections: Connections are secure, correctly aligned, and completed using the specified materials.
-
Backfill: Material and compaction meet the project requirements.
-
Surface drainage: Finished grades direct runoff toward the inlet as designed.
-
Access and maintenance: The grate can be accessed and removed as intended for future inspection and cleaning.
-
Required testing: Any specified inspection, testing, or approval has been completed and documented.
Where the design calls for a sump or sediment collection area, confirm that its configuration matches the project requirements. The sump helps collect debris before it enters downstream piping, but it does not remove the need for routine maintenance.
What Common Catch Basin Installation Mistakes Should You Avoid?
Several installation errors can reduce drainage performance or lead to expensive repairs.
Choosing the wrong basin size: The basin must suit the drainage layout, pipe connections, available depth, and loading requirements. Confirm these details before ordering.
Using an unsuitable base: A weak or uneven foundation can cause settlement. Prepare the base according to the project design.
Ignoring the finished grade: If the grate is too high, runoff may pass by it. If it is too low, the surrounding surface may collect water or create a hazard.
Misaligning pipes: Poor alignment can affect flow and place stress on connections. Check invert elevations and pipe positions before backfilling.
Backfilling too quickly: Uneven placement or inadequate compaction can lead to movement and settlement.
Using an unsuitable grate: A grate and frame must be compatible with the basin and designed for the expected traffic loads. A light-duty product is not a substitute for a traffic-rated assembly.
Skipping inspections: Inspecting connections and levels before backfilling makes problems easier to correct than discovering them after the surface is restored.
When Should You Use a Professional Installer?
Professional installation is particularly important for roadways, commercial parking areas, municipal drainage systems, deep excavations, and sites with difficult soil or groundwater conditions.
A qualified contractor can interpret the drainage drawings, select suitable lifting equipment, establish the correct elevations, and coordinate inspections. Projects may also require engineering approval, permits, utility coordination, or compliance with local municipal standards.
The exact requirements depend on the site, intended use, and jurisdiction. Product specifications should be checked alongside the project design rather than treated as a complete installation plan.
Where Can You Find Concrete Catch Basins and Grates?
Selecting the right precast unit is an important first step toward a dependable drainage installation. Acton Precast supplies concrete catch basins, risers, frames, and grates for a range of drainage applications.
Explore the Catch Basins & Grates product range to review available models, listed dimensions, weights, and technical drawings. Confirm the required configuration, loading, and pipe connections before ordering.
With proper planning, a stable foundation, accurate pipe alignment, and careful backfilling, a concrete catch basin can help manage stormwater reliably for years. The key is to match the product and installation method to the actual requirements of the site.